CertBot不再支持所有的操作系统
在照着之前写过的文章去申请 Let’s Encrypt 证书时报错 , 发现系统不再被支持
1 | Your system is not supported by certbot-auto anymore. |
certbot-auto 不再支持所有的操作系统 . 根据作者的说法 , certbot 团队认为维护 certbot-auto 在几乎所有流行的 UNIX 系统以及各种环境上的正常运行是一项繁重的工作 , 加之 certbot-auto 是基于 python2 编写的 . 而 python2 即将寿终正寝 . 将 certbot-auto 迁移至 python3 需要大量工作 , 非常困难 , 因此团队放弃对其维护.
既然如此 , 现在我们还能继续使用 certbot 吗 ? certbot 团队使用了基于 snap 的新的分发方法
环境
CenterOS 7
Nginx
安装 Let’s Encrypt
1. 安装之前 , 需要先安装 snaps
1 | yum install epel-release |
2. 安装 snapd 并启用
1 | yum install snapd |
3. 创建桥接
1 | ln -s /var/lib/snapd/snap /snap |
退出账号并重新登录 , 或重启系统 , 确保 snap 启用
4. 将 snap 更新至最新版本
1 | sudo snap install core |
5. 卸载已安装的 certbot
若在系统上已经部署过 certbot , 需要将其卸载先
1 | yum remove certbot |
6. 通过 snap 安装 certbot
1 | snap install --classic certbot |
7. 建立软连接
1 | ln -s /snap/bin/certbot /usr/bin/certbot |
8. 获取证书
确保 nginx 处于运行状态 , 需要获取证书的站点在 80 端口 , 并且可正常访问.
1 | certbot certonly --nginx --email xxx@mail.com -d a.do.com -d b.do.com |
按照 文章 所述接着配置
9. 更新证书
手动更新
1 | certbot renew |
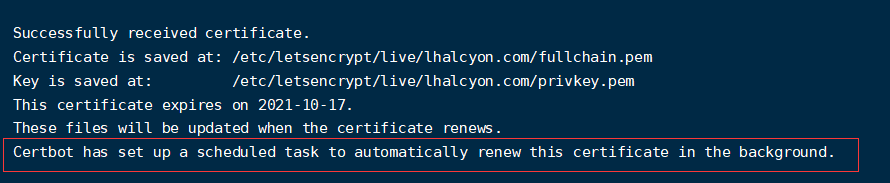
如图 , 在生成时已经自动添加了个后台任务去定期自动 renew 证书 , 所以一般情况不用手动更新
参考资料
本博客所有文章除特别声明外,均采用 CC BY-NC-SA 4.0 许可协议。转载请注明来自 Halcyon Days!